ECE 5725
Music Looper
Sijin Li (sl2624), Jamie Poole (jep349)
Project Demo Video:
Objective
Our objective is to create an audio looper with multiple channels, in which one can record short sound bites to be overlayed with one another for quick music production. We also want our project to have a keypad that can be used to play a variety of instruments that can also be recorded and looped over one another.
Introduction
For our final project, we created an audio looper device using a Raspberry Pi with a keypad capable of playing multiple instrument sounds. Our project has two modes: Keypad mode, which allows users to select instruments and record sound-bites in up to two audio channels using the light-up keypad; and Looper mode, which, when activated, overlays the sound in the two audio channels to create a repetitive audio loop. This project is useful to quickly create music tracks, and is targeted at new musicians starting out on creating songs and remixes.
Design & Testing
Initial Ideas
Our project has certainly undergone some revision since our initial proposal. We started with the idea that we wanted to create an audio device with looping functionality and a keypad that generates sounds from a selection of instruments when keys are pressed. This audio device should also be able to record the user’s voice with a microphone. Below are some preliminary diagrams and drawings to demonstrate the components of our project:
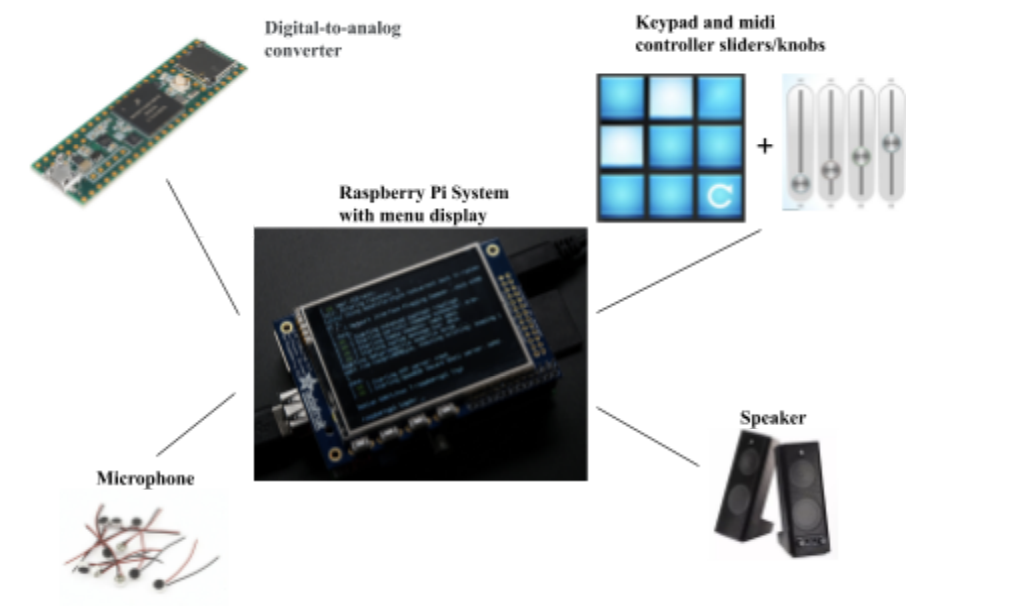
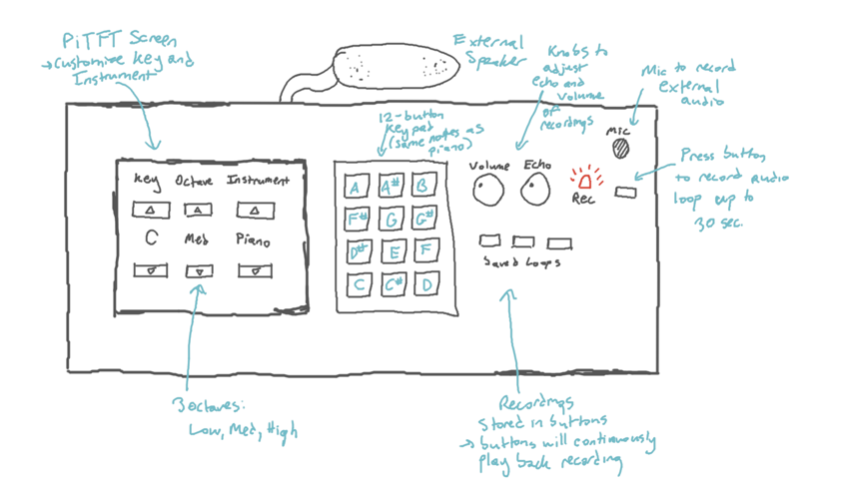
In our initial design, we wanted to include the capability to modify the sound as it is being played, with potentiometers and sliders. However, due to time constraints, we realized that this would be a difficult thing to implement and ultimately not a necessary feature of our final product.
PiTFT Display Implementation
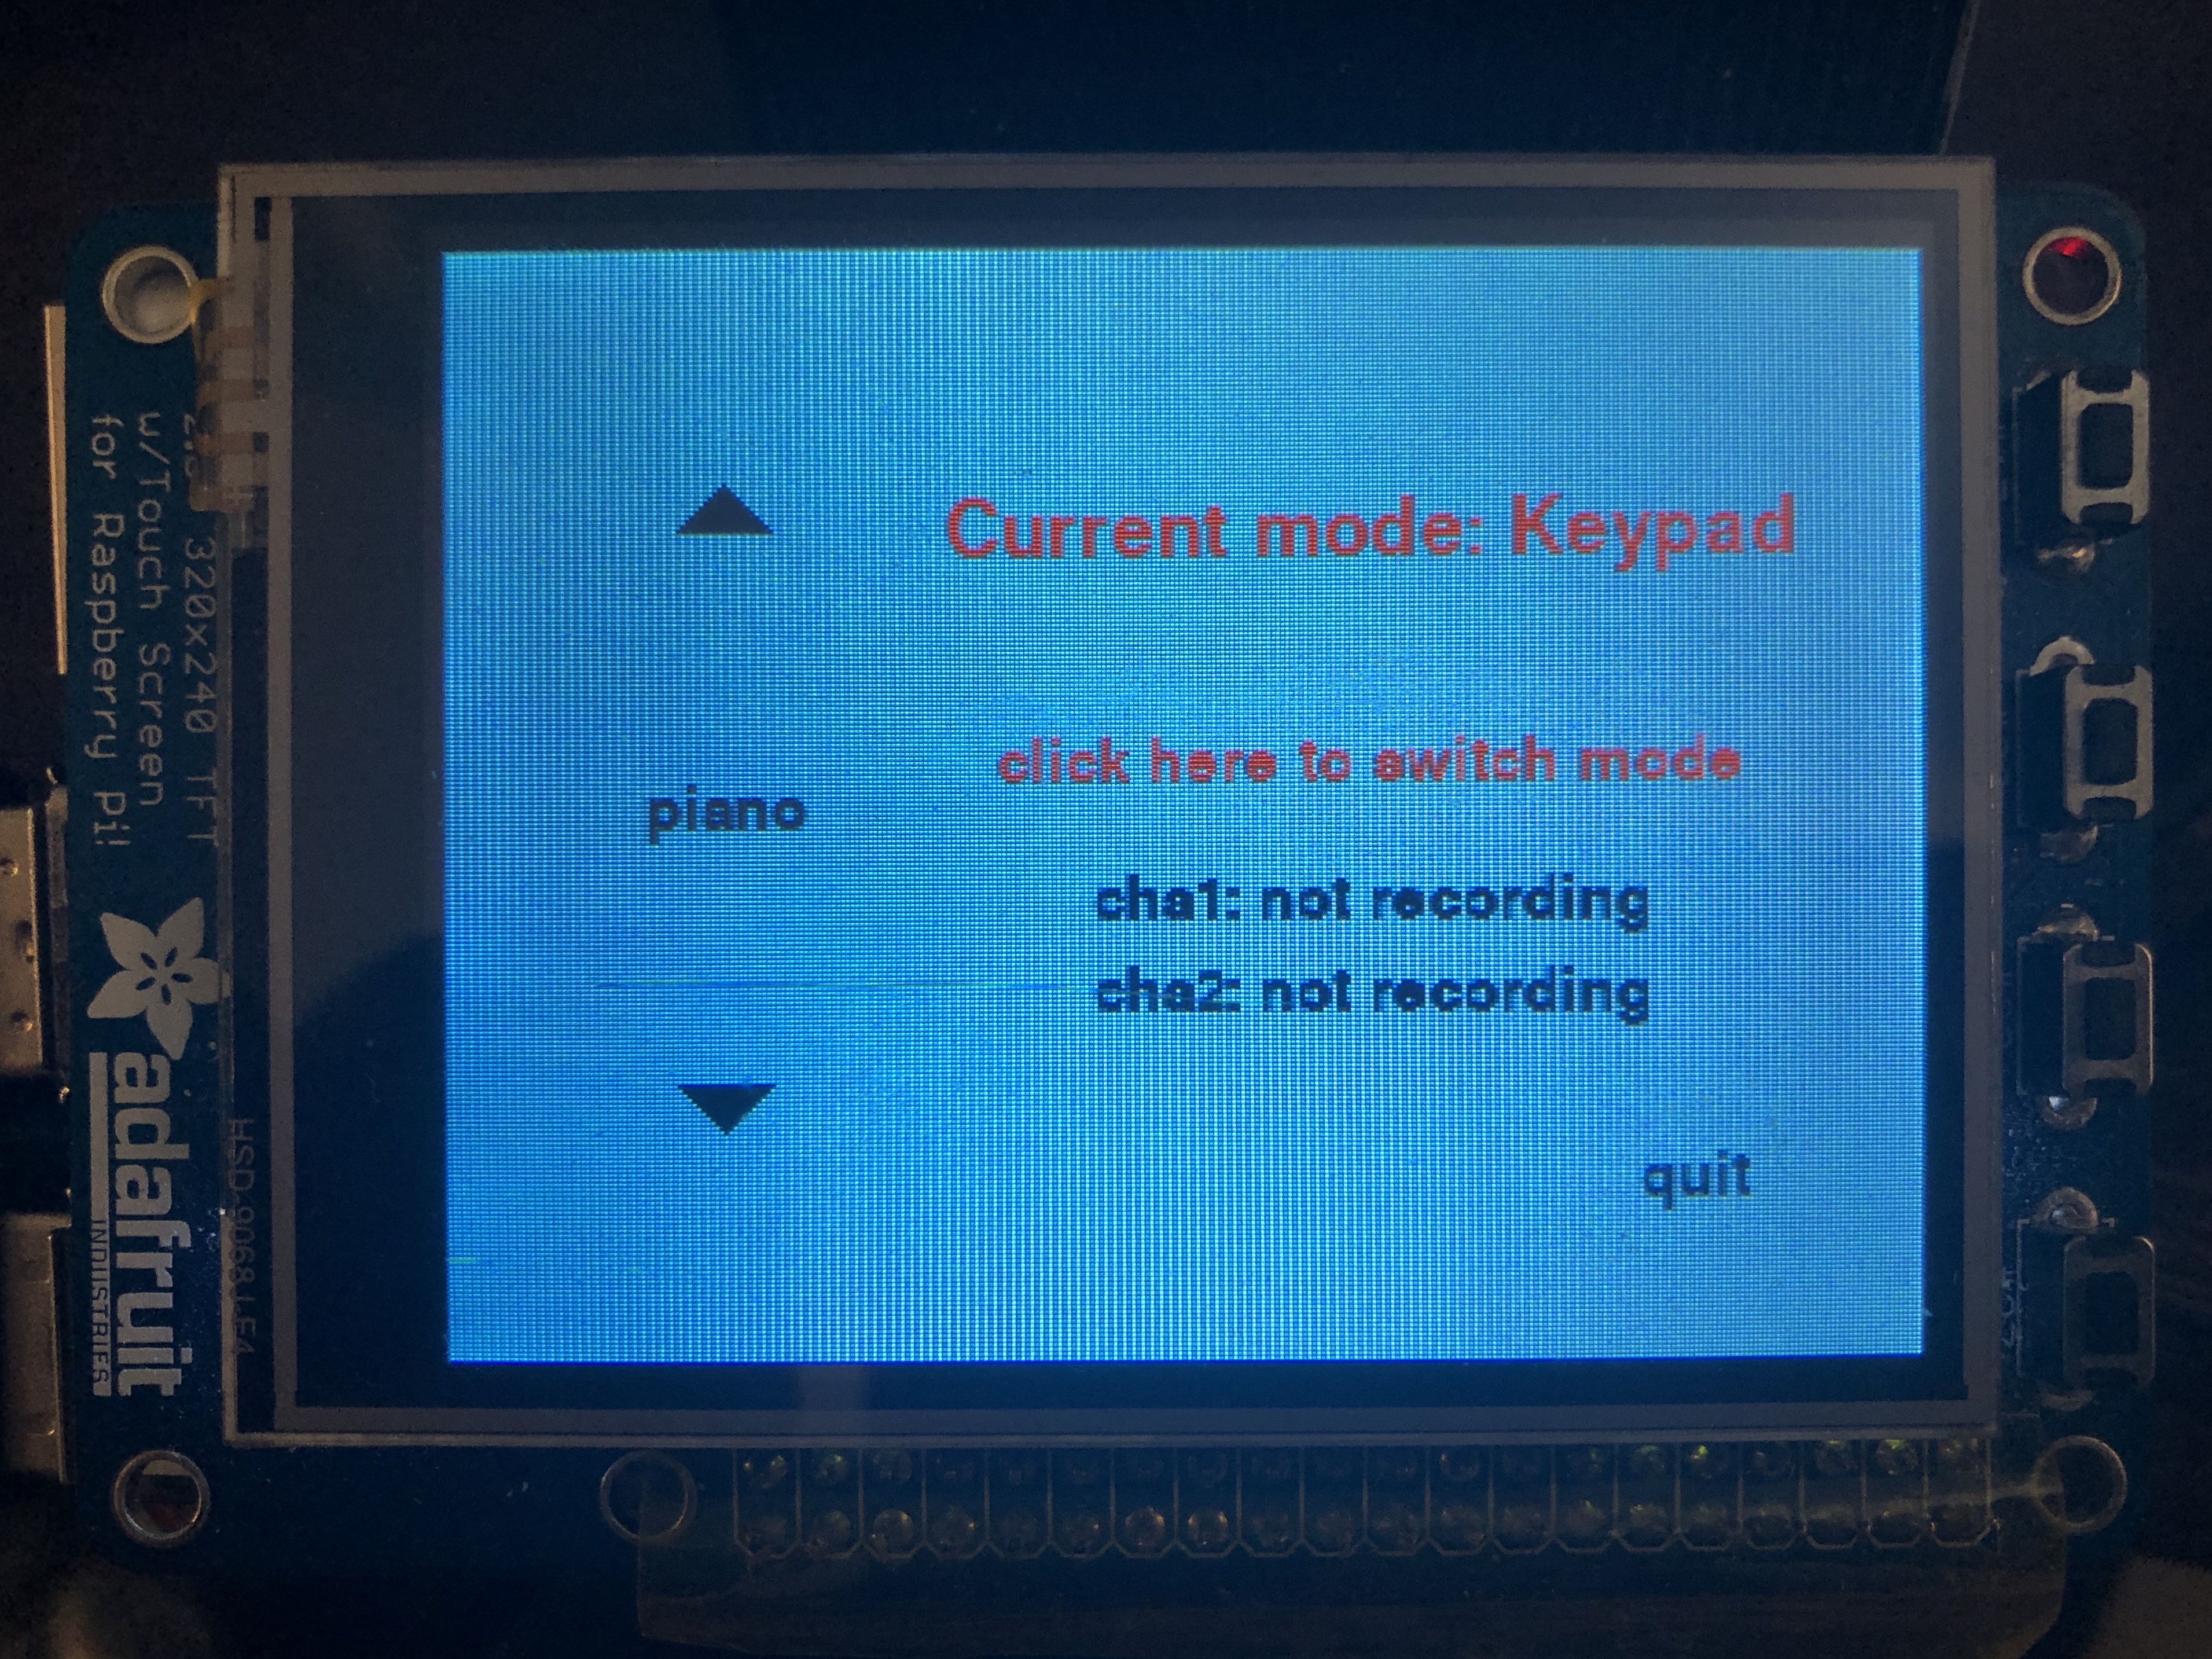
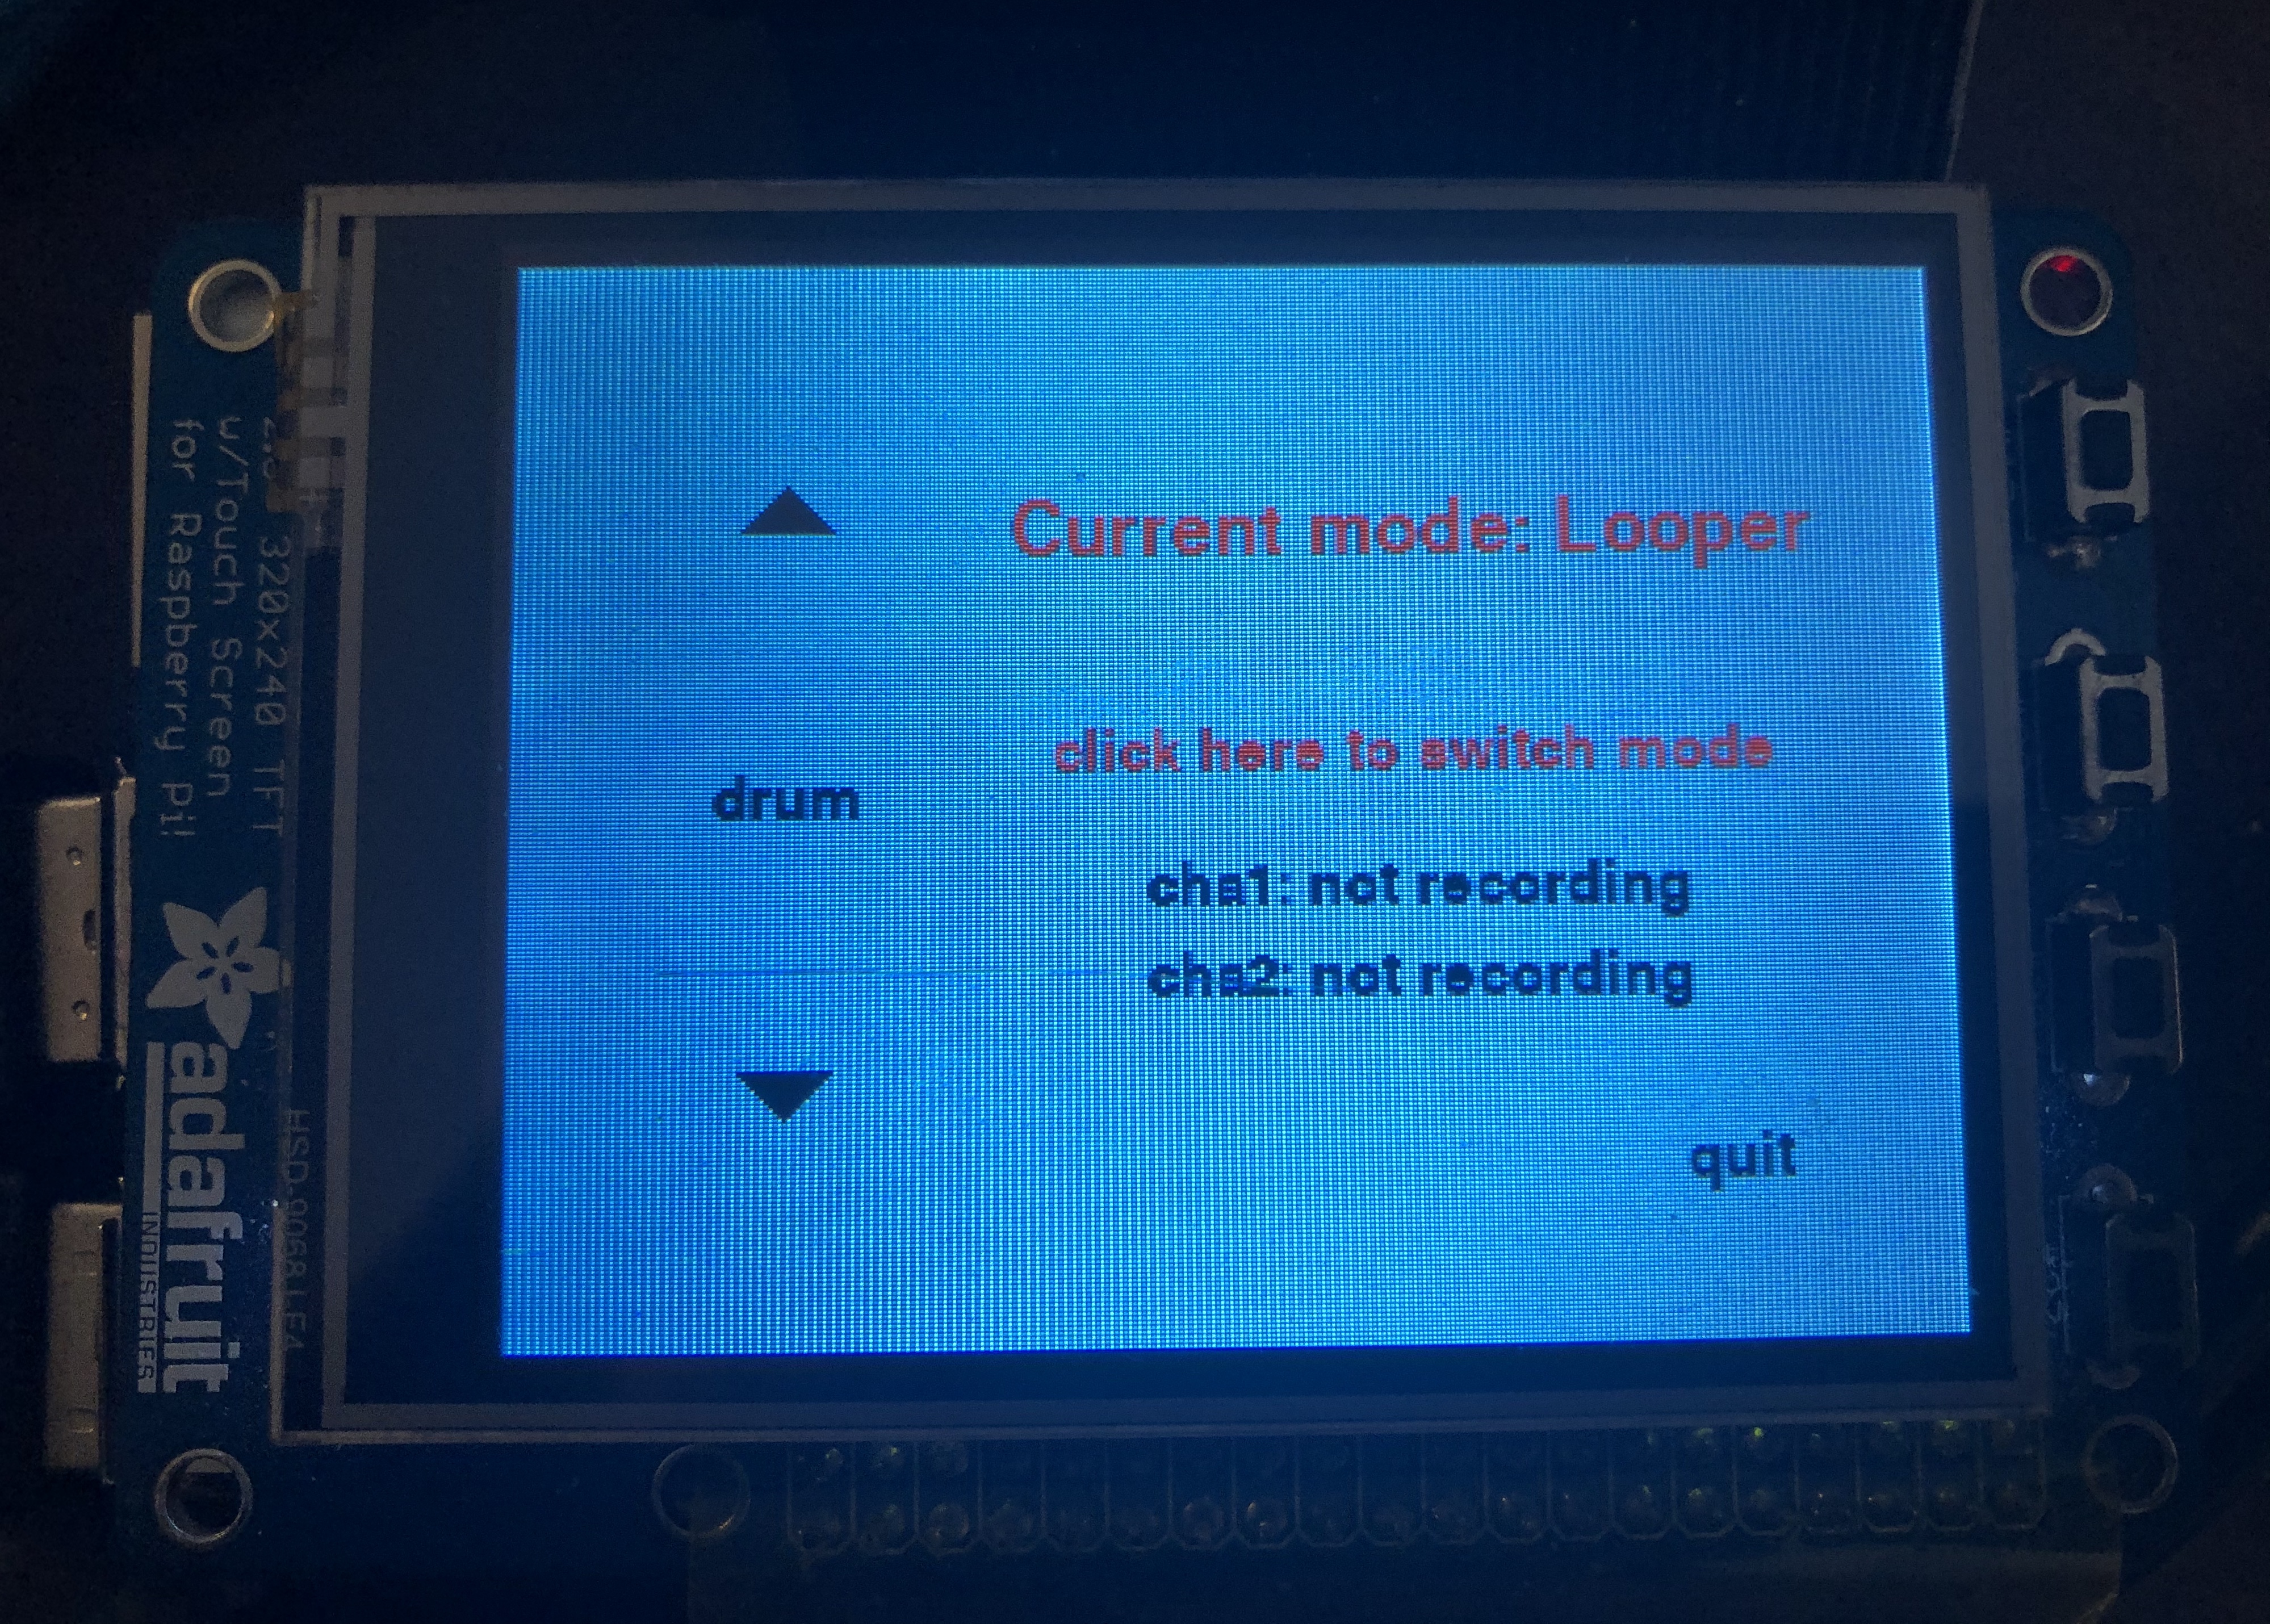
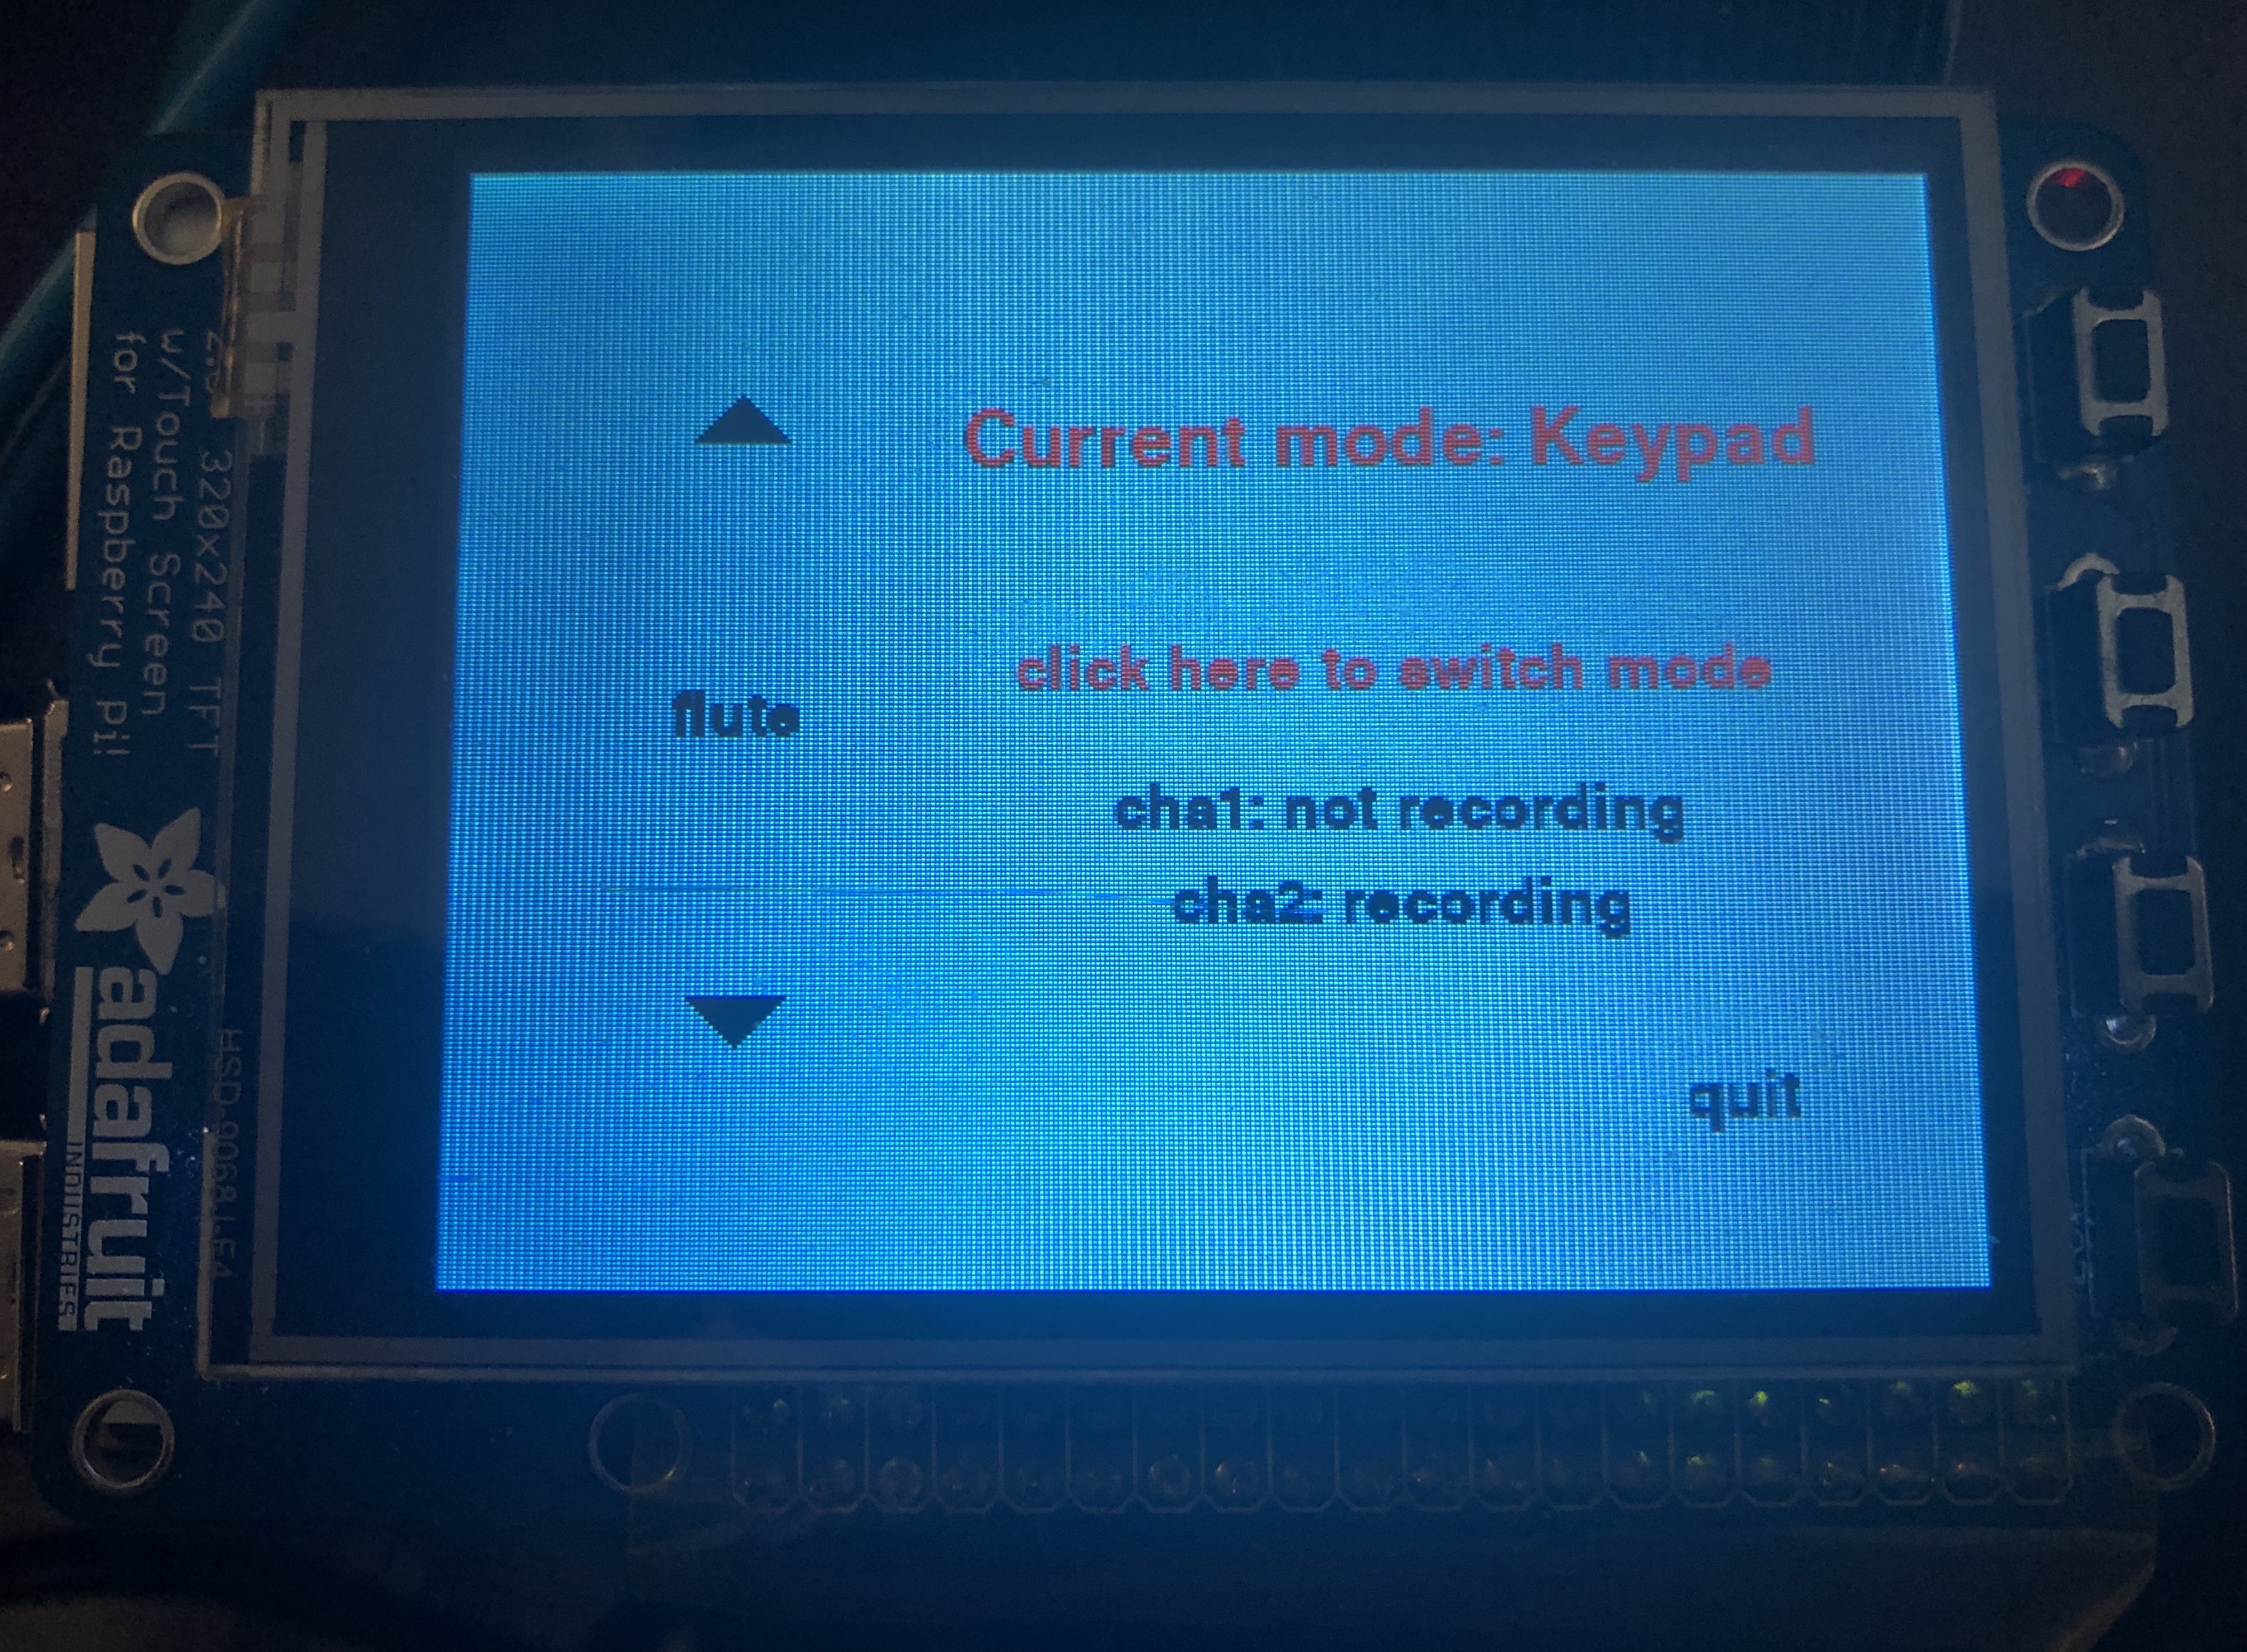
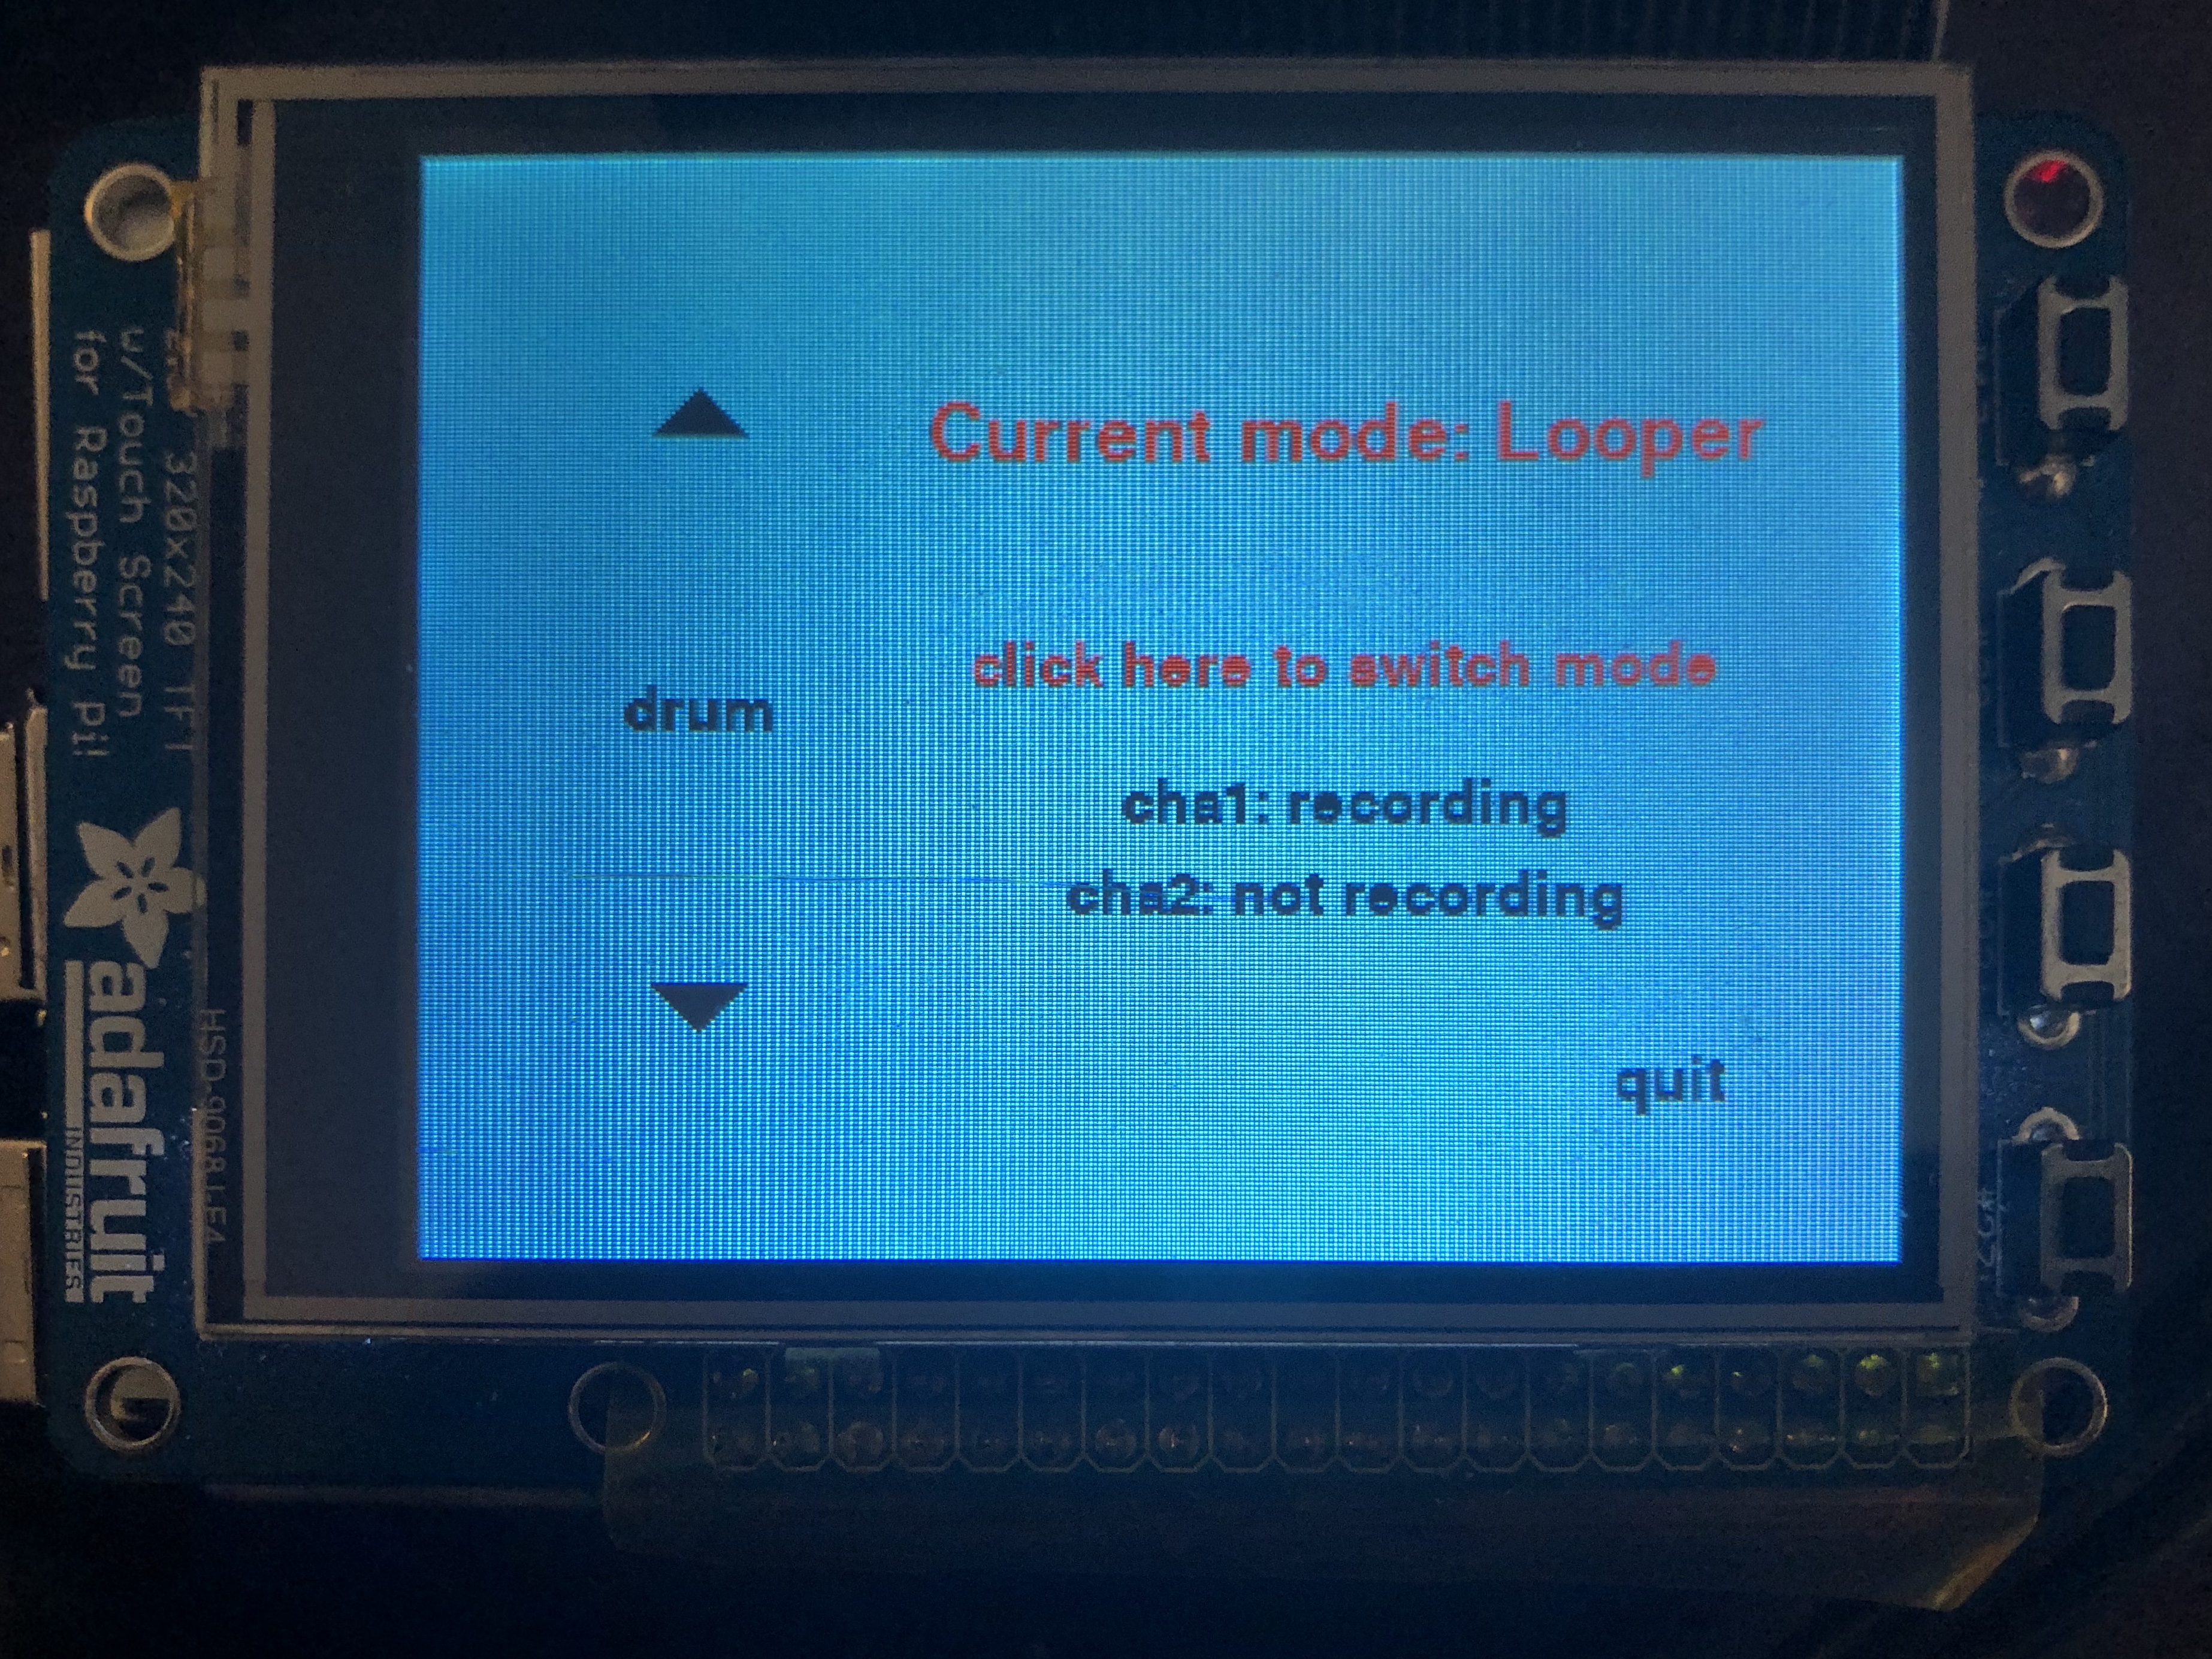
To create the interactive touchscreen display on the PiTFT, we utilized the PyGame library. We wanted our display to be simple and easy to interact with, while also showing all the necessary information in real-time. At the top of the screen, we show the mode (Keypad or Looper) that the device is in. In Keypad mode, on the left side of the screen, users are able to press the arrows to select between a variety of instruments to play. Whichever instrument is shown between the arrows is the instrument which will be played as the user presses buttons on the keypad. In the middle of the screen, there is text that reads “Click here to switch mode”. When that text is clicked, the device will switch to the other mode, and the mode shown at the top of the screen will be updated.
Another feature of the display is showing when the device is recording. When one of the two external buttons are pressed, audio will be recorded for five seconds into the corresponding channel. As soon as audio for one channel begins recording, the TFT display will update the text next to the corresponding channel label, which will read “recording”. After five seconds, the text next to the channel label will return to reading “not recording”, to show the recording has finished. Users are able to record in both Keypad and Looper mode, but in Looper mode, the keypad functionality will be disabled, so they are only able to record voice.
Keypad
We chose to use the Adafruit 4x4 Trellis Keypad for this project, because it is very easy to connect and works well with the Raspberry Pi. Additionally, it is well-documented by Adafruit, which makes it very easy to test and understand its functionality.
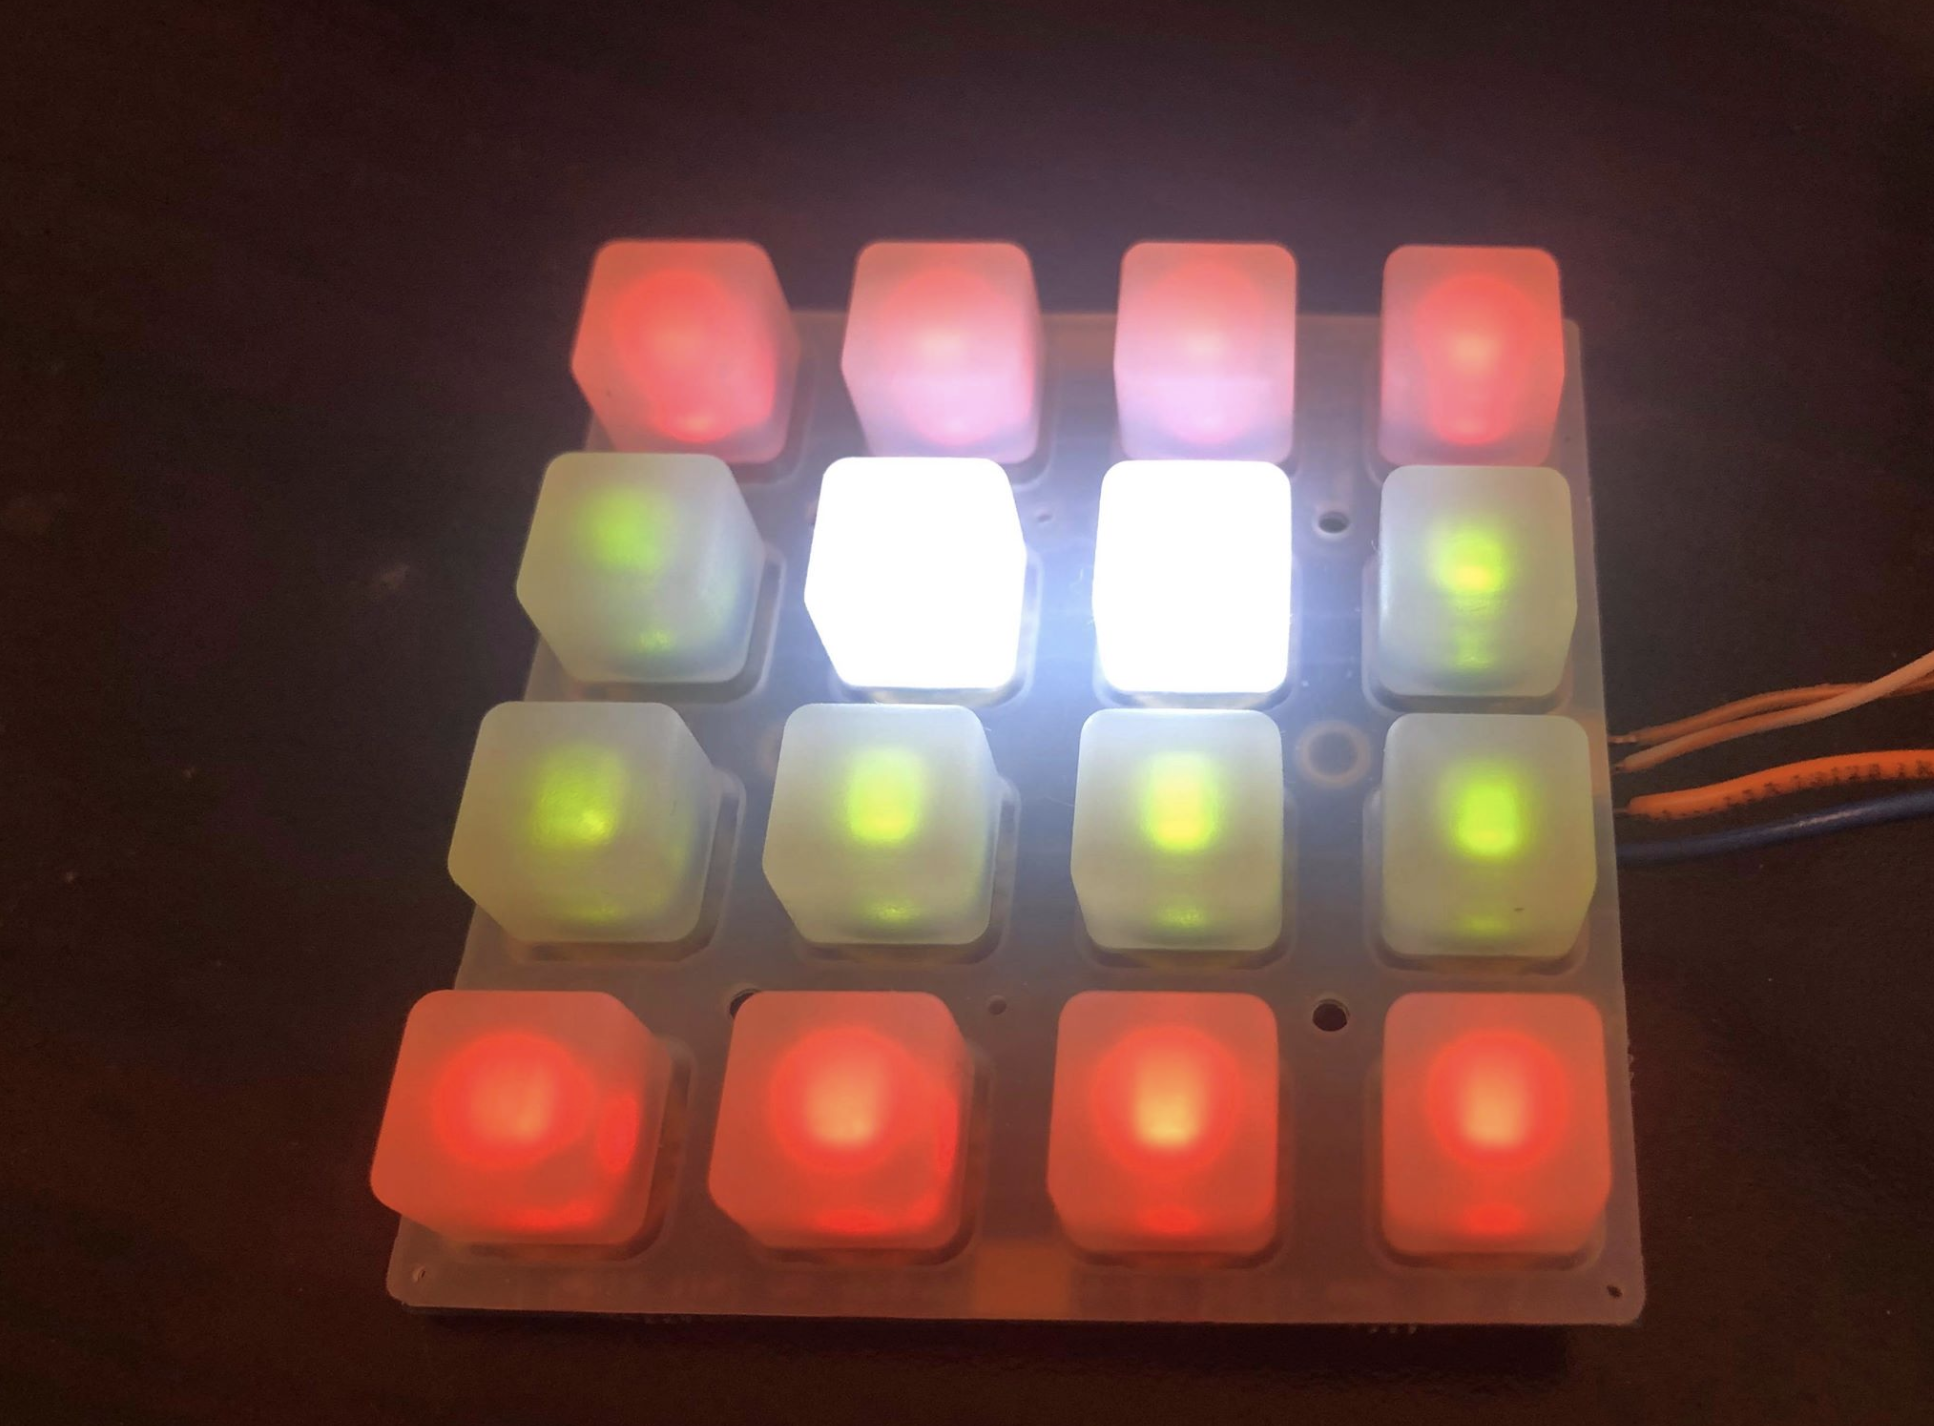
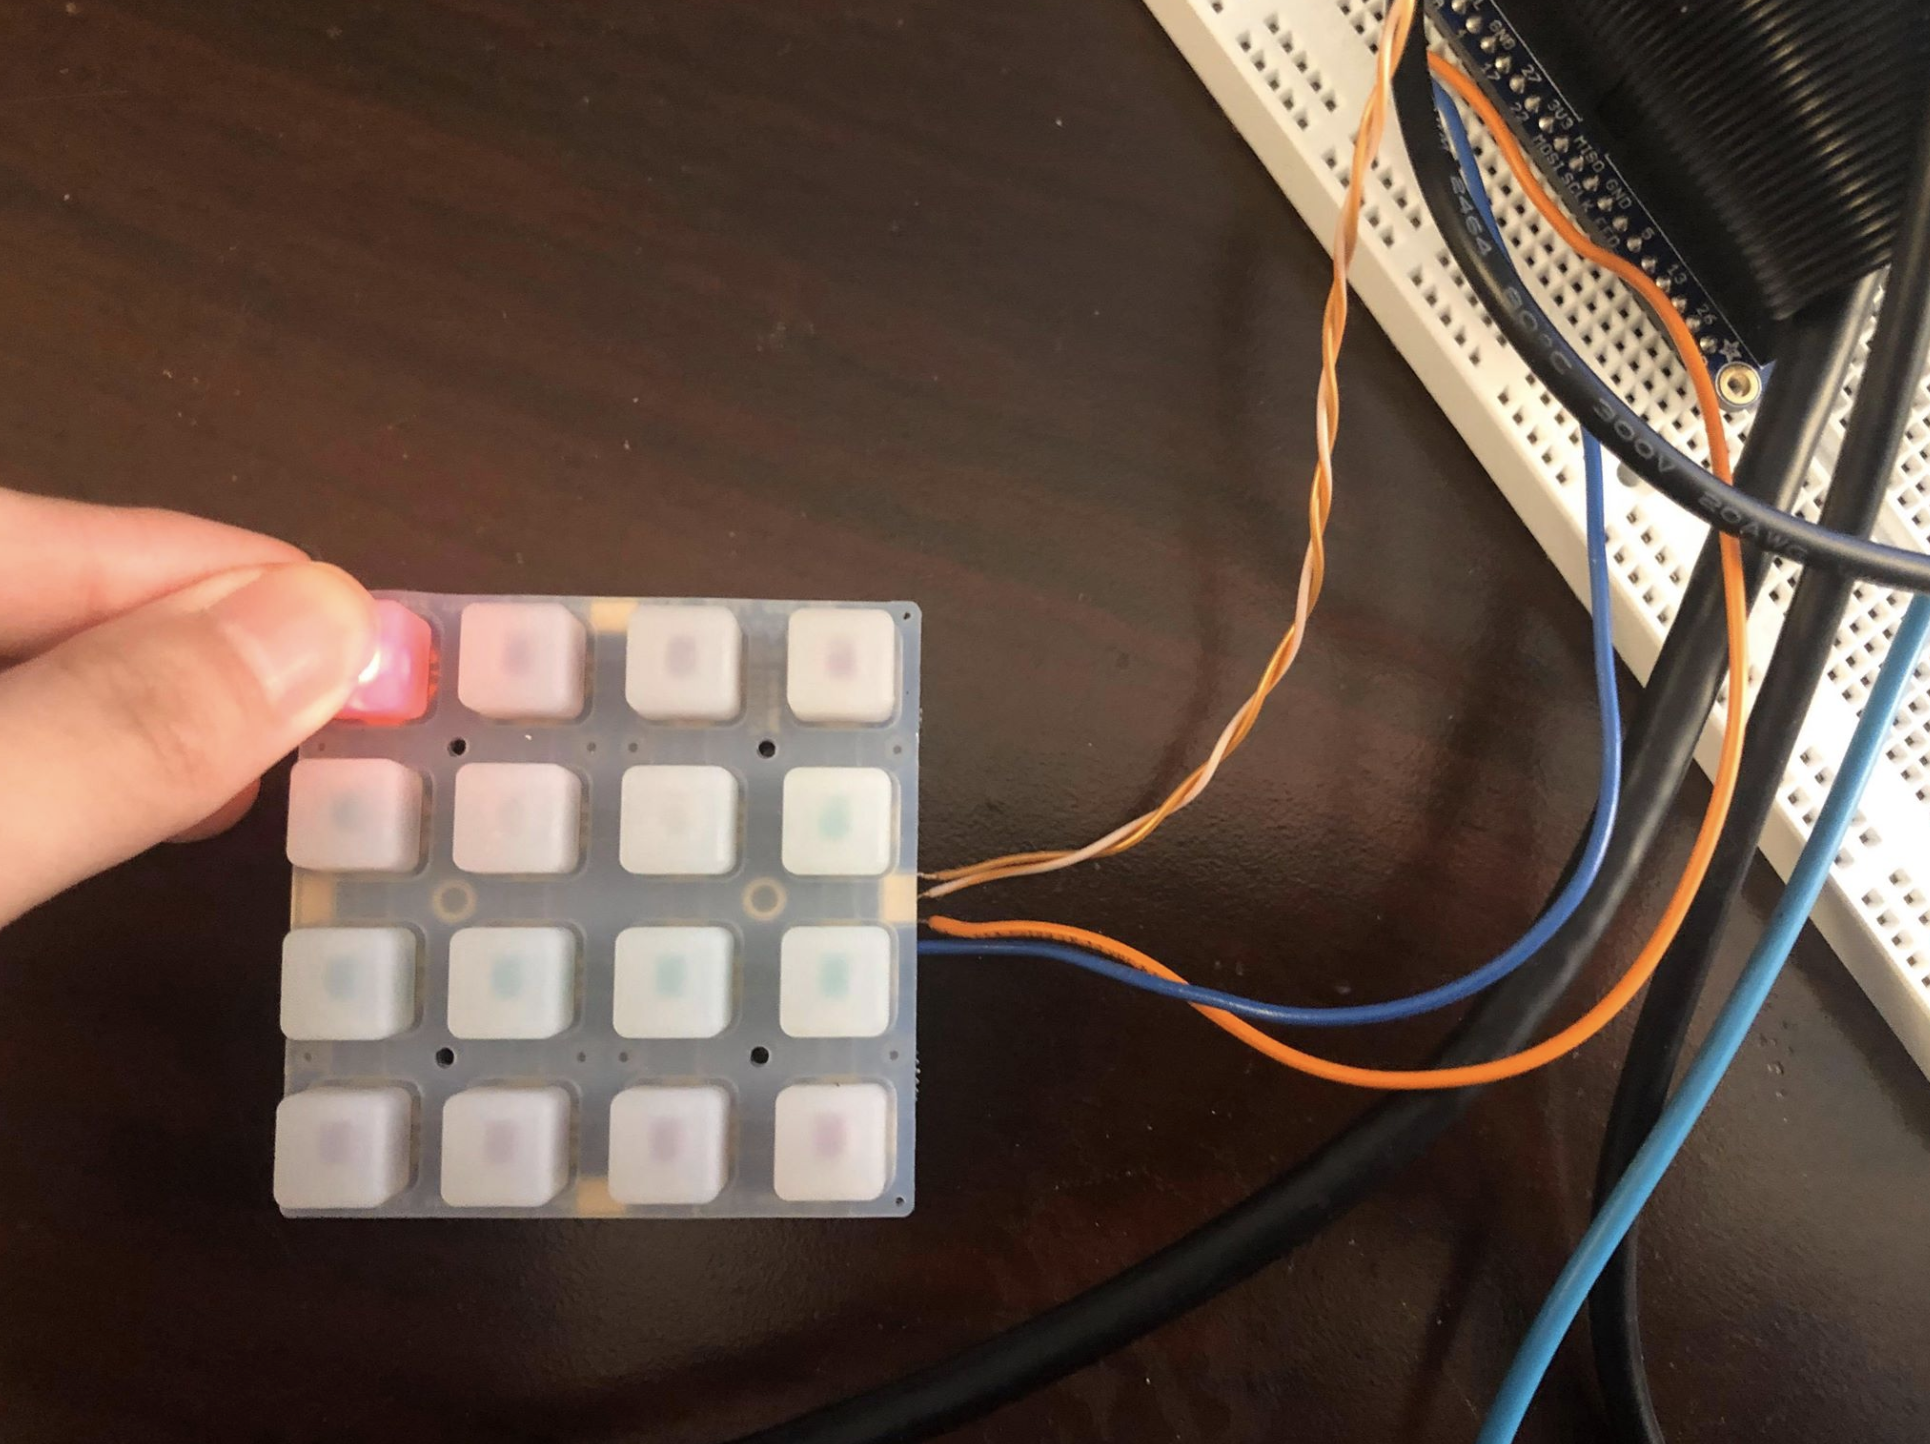
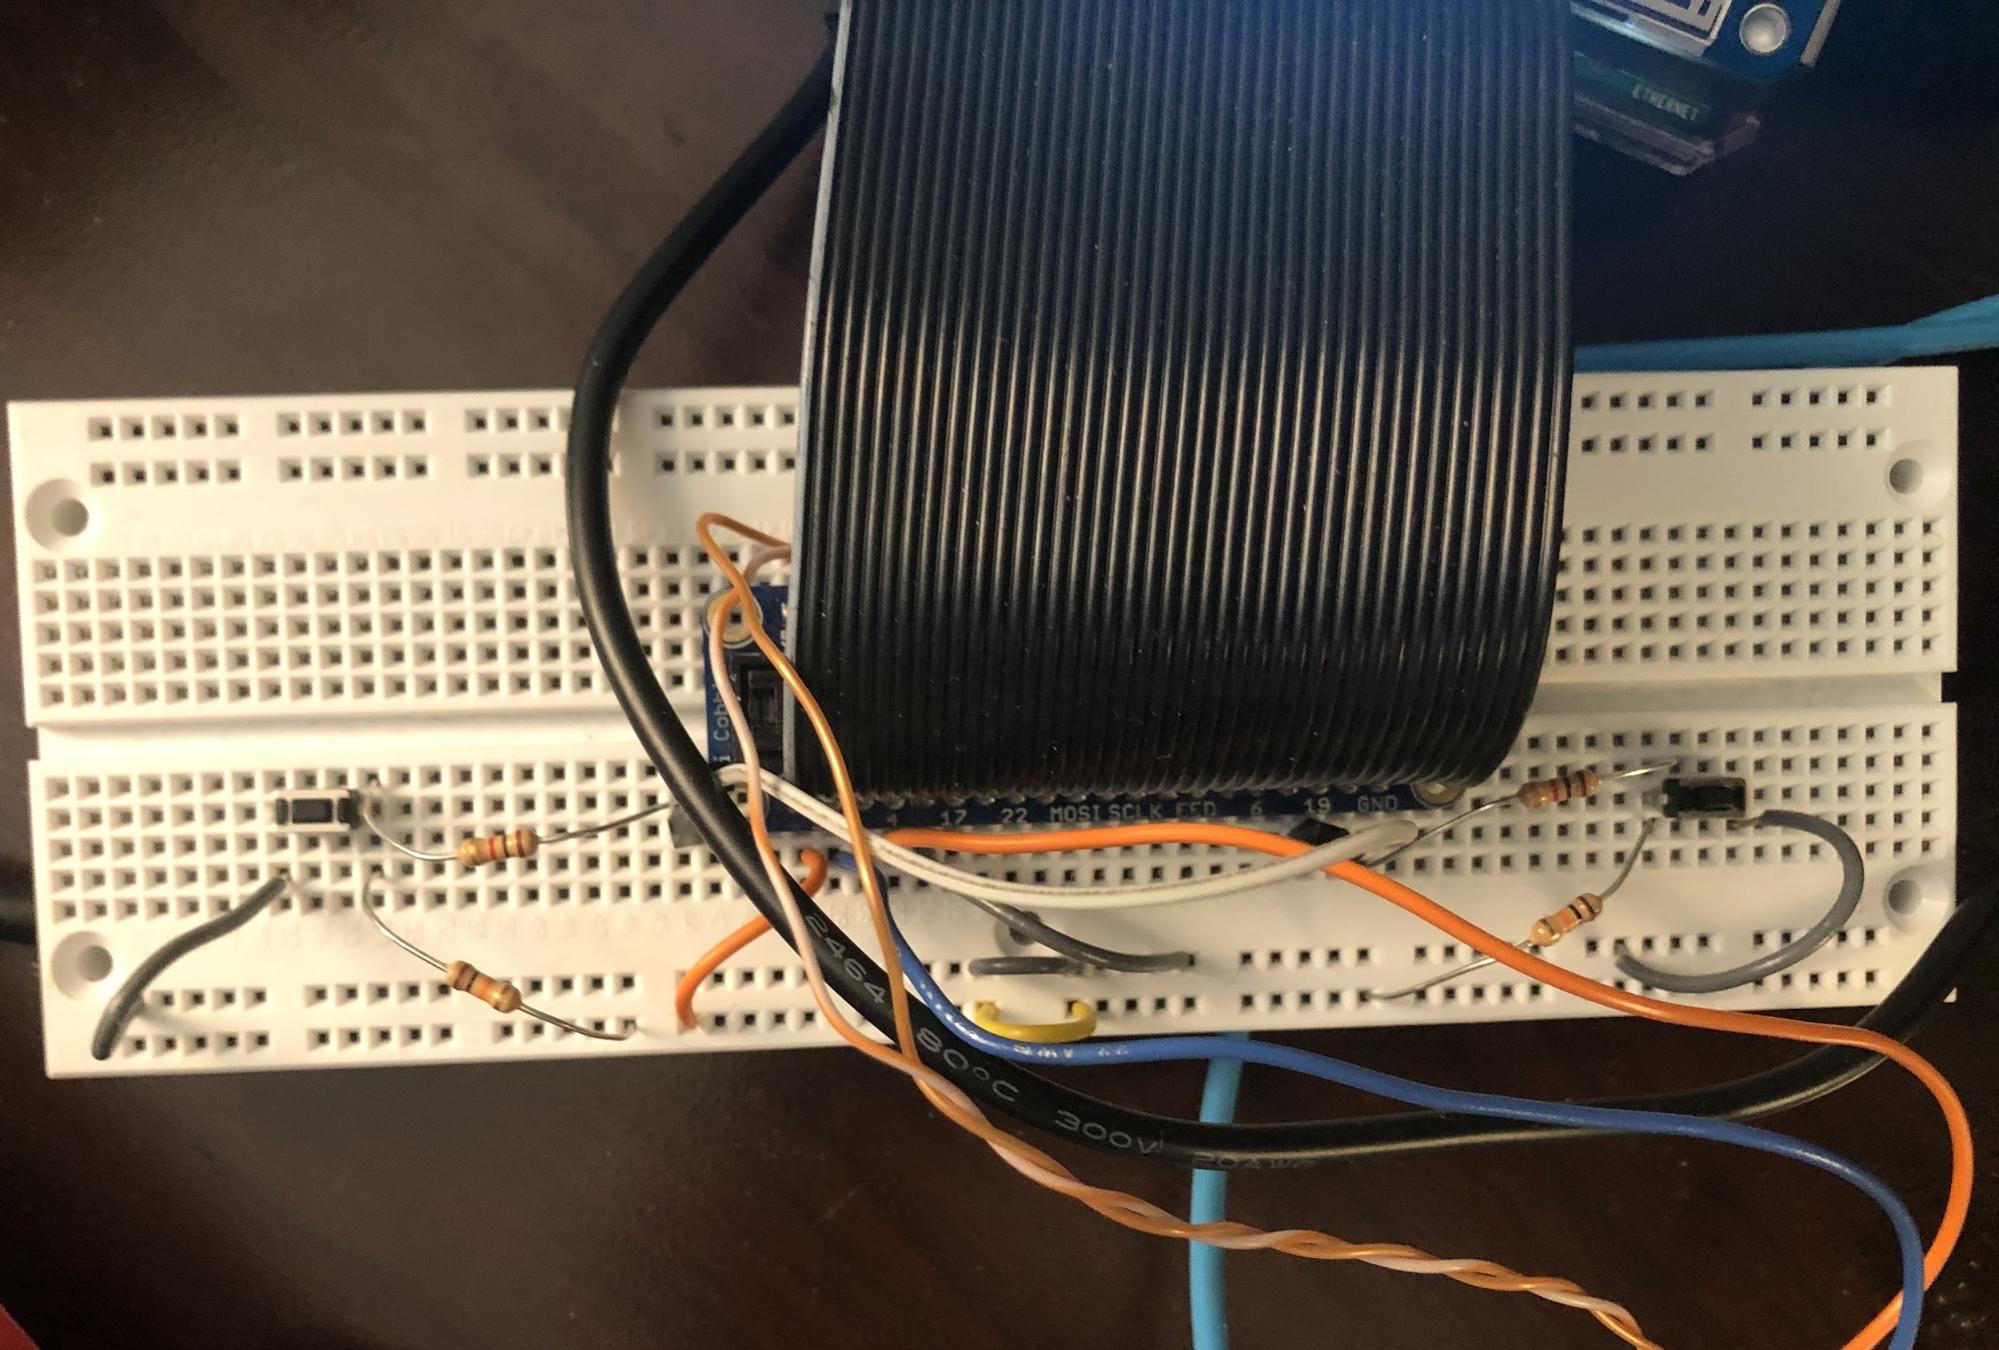
To prepare the keypad, we soldered 16 LEDs of varying colors to the PCB. Using our breadboard, we connected the keypad to the Pi so that it could communicate via the I2C interface, following the diagram and instructions given by [3]:
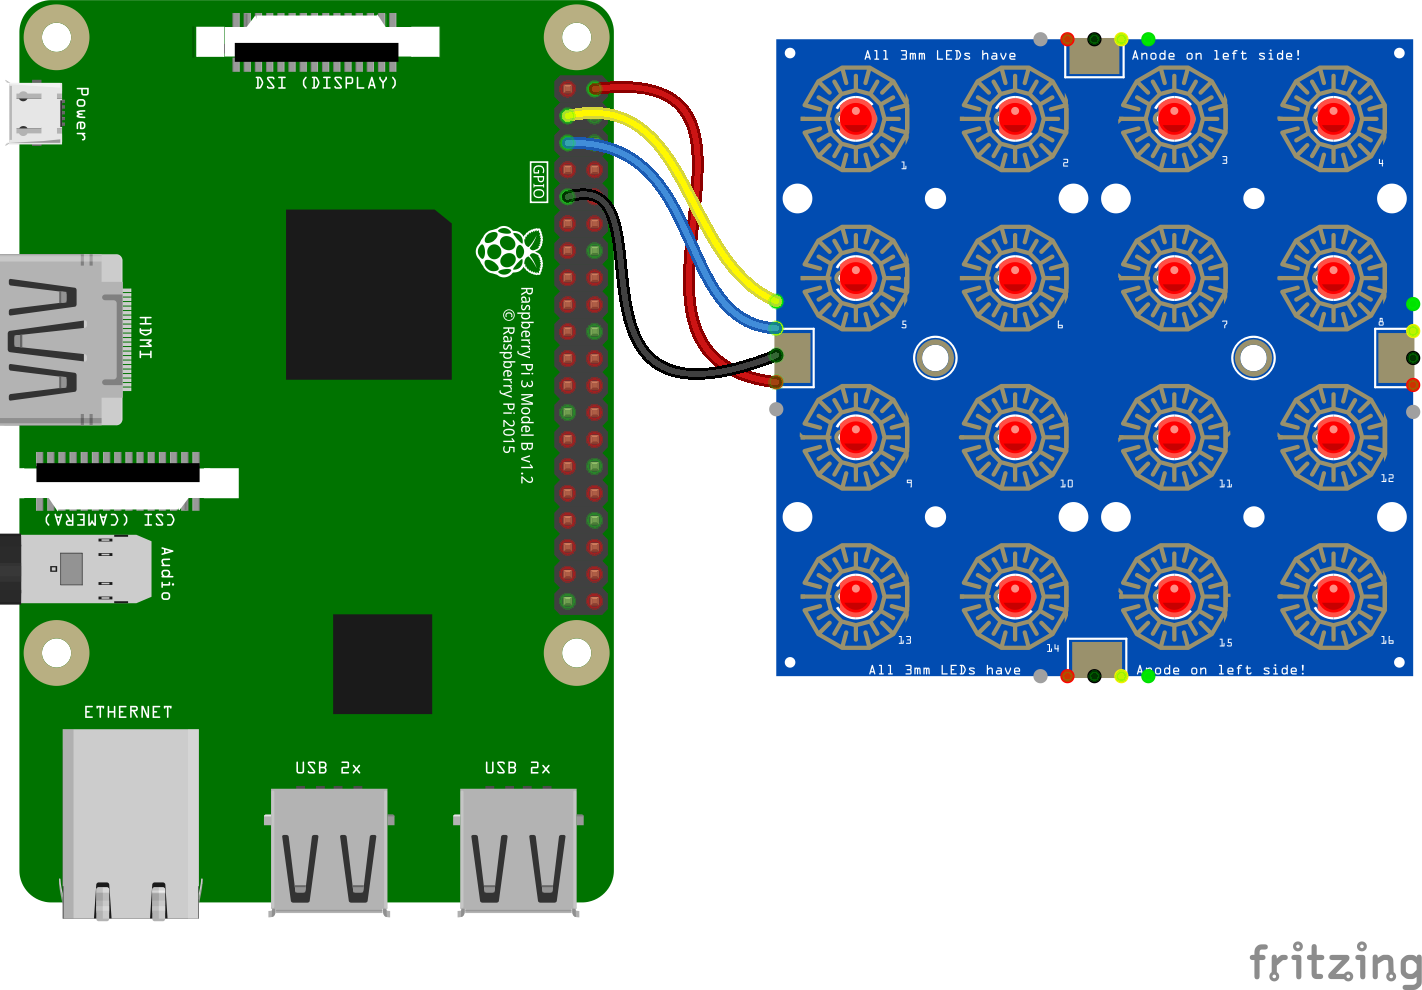
To implement the audio sounds, we downloaded 16 sounds from each instrument: piano, flute, violin, and drum. We got these sounds from Freesound, a website that provides thousands of non-copyrighted sounds. Next, we converted each sound to 16-bit .wav files using Audacity and stored each group of 16 instrument sounds in a separate folder on the Raspberry Pi. We added Pygame commands to the key detection code from [3], and were able to play sounds using a speaker connected via the audio jack while pressing keys on the keypad.
Recording
We definitely ran into a lot of roadblocks while implementing recording. Initially, to attempt recording audio from a USB mic, we wanted to use the PyAudio library, which could be used to write code that could let the mic record sound and have the recording be stored as a .wav file on the Raspberry Pi. Unfortunately, when installing this library, we realized it could not be supported by the Raspbian release that our Pi was running, and it ended up updating the release, which caused us to lose all functionality of our other features.
Once we were able to restore our work from before, we decided to implement audio recording with a new approach: using ALSA commands. This was actually a much simpler implementation, since we could just call an ALSA command from our Python script via OS in a single line. This would occur in button interrupts, since the recording should trigger when a button is pressed. Our device had two simple, external buttons connected to GPIO pins on the Pi, each corresponding to one recording channel (shown on the PiTFT). When one button was pressed, the Pi would trigger an interrupt.
Within the interrupt handler, we would change the PiTFT text to show that the channel was recording, then call the “arecord” command to start recording, then change the text on the PyGame display back to “not recording”. Because the recording feature was occurring within button interrupts, this allowed for us to record in both the Keypad and Looper modes.
Looping & Playback
One of the more difficult features of our device to implement was looping the audio that had been recorded. We wanted to play audio from both channels at the same time. Initially, we also tried to do this using ALSA commands, since these only took up one line. However, this proved difficult because we could not properly overlay both sounds, even while running one command in the background and one in the foreground.
After looking more into overlaying audio, we came across the PyDub library, which was created for the purpose of easily manipulating audio through Python. This library was easy to install and already had a command for the purpose of overlaying two audio files and storing the result in a third audio file. We implemented this in the main While loop in our code, so that the overlaid audio file would constantly be updated each time our code looped. Unfortunately, each time we called for the audio to be played, this would stop updating Pygame, so the Keypad would not work at the same time as looping. This is why we decided to implement two separate modes to ensure that all of our main features worked properly.
Testing
Because we were in two separate locations for the duration of this project, thus needing to work remotely, it made it very difficult to test different parts of the code. Luckily, we were given instructions to use SSH to access the Raspberry Pi remotely. Since Sijin physically had the Raspberry Pi, she connected it to a desktop monitor, and Jamie would use SSH to log into the Pi when needing to test a part of the code. Additionally, we constantly utilized our GitHub to push and pull code for the other to use and test. Often times, if Jamie was unable to log into the Pi because Sijin was testing another part of the code, Jamie would install the necessary libraries on her personal computer and run the code, pushing necessary changes to the GitHub. This allowed for both of us to have and test the same code, even while apart.
Results
Overall, we were very successful in the implementation of our project. This device has both keypad and looping functionality, and is very easy for a beginner to use and create songs. Both device modes work very well, and it is very easy to switch between the two modes using the TFT display. Additionally, the device records sound very well, and does allow a variety of instruments to be played using the keypad and selecting the instrument on the touchscreen display. However, one thing we were unable to implement was sound modification using potentiometers, because we would need to utilize an Analog-to-Digital converter, which we simply did not have. Despite this, we certainly have met our goals for this project.
Conclusions
Our project was able to achieve both keypad and looper functionality, for users to create music in new and interesting ways. We also were impressed that we were able to implement recording functionality via a USB mic attached to the Raspberry Pi, because we had difficulties attempting to install the PyAudio library for recording since it did not work with our version of Raspbian. Unfortunately, one thing that we found that did not work was allowing for the keypad to work when the audio was looping. Because we used the PyGame Mixer to play audio from the keypad, and the PyDub library to allow for looping and overlay, it would have been impossible for the Raspberry Pi to play both kinds of sounds at once. Overall, we were able to achieve many impressive feats with this project, and we certainly would add more interesting features if time allowed.
Future Work
If we had a longer timeframe to work on our project, we would definitely try to implement simultaneous functionality of the keypad and looping. We would likely need to create some sort of concurrency algorithm that runs one mode in the foreground and one in the background, or utilize the PyGame library to play the recorded audio files in multiple audio channels in the PyGame mixer. The reason we were unable to do the latter during this project was because PyGame is only able to play .wav files that are converted to signed 16-bit, which cannot be done automatically in the code. Perhaps if we had more time we could look into a conversion method for the recorded audio files to get them to play with the PyGame mixer, instead of using the PyDub library.
Additionally, if we had more time, we would have liked to implement real-time sound modification, such as adjusting the echo, fade, or bass of an audio loop using potentiometers. In order to do this, we would need to implement analog-to-digital conversion. This would certainly have been possible within our timeframe if we had been working in lab and been given more components such as capacitors, but from a remote workspace, it was more difficult to work on this implementation.
Budget
- The Raspberry Pi system, buttons, LEDs and resistors -Provided by lab
- Adafruit Trellis Monochrome Driver PCB for 4x4 Keypad & 3mm LEDs -$9.95
- Silicone Elastomer 4x4 Button Keypad - for 3mm LEDs -$4.95
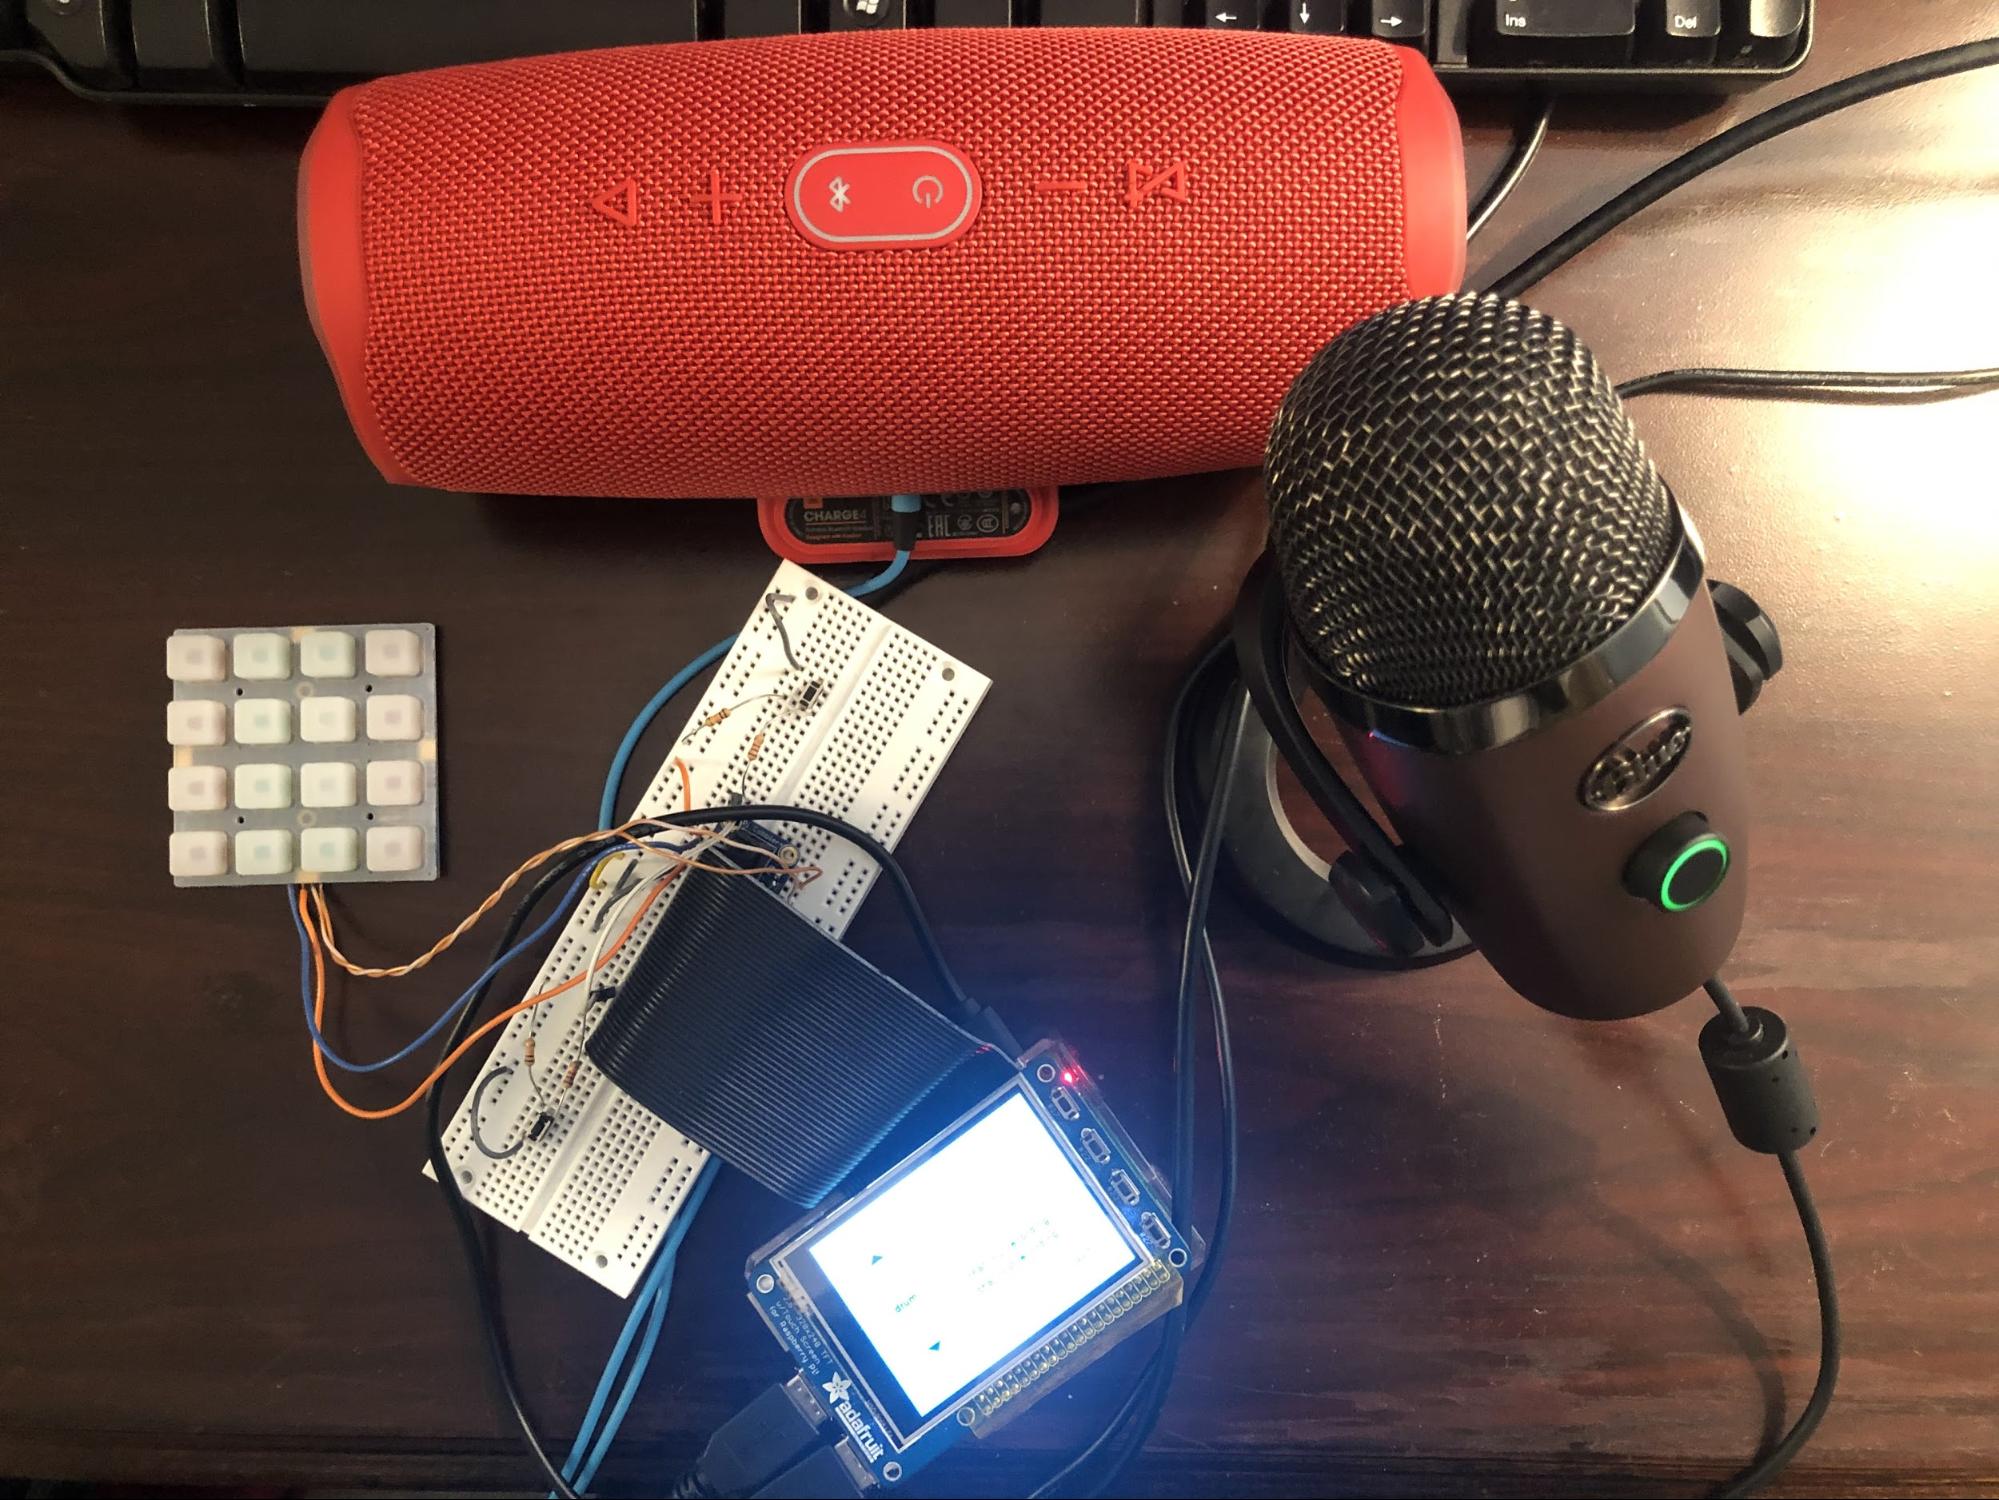
- Blue Yeti Nano Premium USB Mic for Recording -Already owned
- JBL Charge 4 - Portable Bluetooth Speaker -Already owned
Total: $14.9
References
[1] Soundpad (5725 Fall 2019 Project)
[2] Adafruit Trellis Datasheet and Instructions
[3] Adafruit Python and CircuitPython Documentation
[4] Pygame Mixer Documentation
[6] Simple Audio Processing in Python with Pydub (Medium.com)
[7] Lab2 and Lab3 Instructions for Pygame (From 5725 Canvas Site)
Thank you to Professor Skovira and the Cornell ECE 5725 course staff for making this project possible. For the full code repository, see our Github page. Our main source code blink-withpydub.py is shown below:Appendix
Team Member Contributions


Acknowledgements
Code Appendix
		import RPi.GPIO as GPIO
		import os
		import pygame
		import time
		import busio
		from board import SCL, SDA
		from adafruit_trellis import Trellis
		from pygame.locals import *   # for event MOUSE variables
		import setting
		from pydub import AudioSegment
		from pydub.playback import play

		os.putenv('SDL_VIDEODRIVER', 'fbcon')   # Display on piTFT
		os.putenv('SDL_FBDEV', '/dev/fb1')
		os.putenv('SDL_MOUSEDRV', 'TSLIB')     # Track mouse clicks on piTFT
		os.putenv('SDL_MOUSEDEV', '/dev/input/touchscreen')

		#initialize pygame and tft
		pygame.init()
		pygame.mouse.set_visible(False)
		WHITE = 255, 255, 255
		BLACK = 0,0,0
		GREEN = 0, 128, 0
		RED = 255, 0, 0
		CYAN = 109, 237, 226 #for background of TFT screen
		screen = pygame.display.set_mode((320, 240))
		my_font= pygame.font.Font(None, 25)
		other_font= pygame.font.Font(None, 20)

		#initialize the screen
		instrument_buttons = ['piano', 'violin', 'flute', 'drum']
		instrument_index = 0    #piano default
		button_states = ['stopped', 'recording', 'playback']

		# keypad mode if 1, looper mode if 2
		global mode
		mode = 1

		my_buttons= {(60,120):instrument_buttons[instrument_index], (270,200):'quit',
					 (200,60):'wait for ready', (200,110):'click here to switch mode',
					 (200,140): "cha1: not recording", (200,160): "cha2: not recording"}

		screen.fill(CYAN)               # Erase the Work space
		for text_pos, my_text in my_buttons.items():
			if text_pos == (200,60):
				font = my_font
				color = RED
			elif text_pos == (200,110):
				font = other_font
				color = RED
			else:
				font = other_font
				color = BLACK
			text_surface = font.render(my_text, True, color)
			rect = text_surface.get_rect(center=text_pos)
			screen.blit(text_surface, rect)

		pygame.draw.polygon(screen, BLACK, ((60,50),(50,60),(70,60))) #up arrow
		pygame.draw.polygon(screen, BLACK, ((60,190),(50,180),(70,180))) #down arrow
		pygame.display.flip()

		# Create the I2C interface
		i2c = busio.I2C(SCL, SDA)
		# Create a Trellis object
		trellis = Trellis(i2c)  # 0x70 when no I2C address is supplied

		# instrument files
		wavefiles = ['01.wav','02.wav','03.wav','04.wav','05.wav','06.wav','07.wav','08.wav',
		  '09.wav','10.wav','11.wav','12.wav','13.wav','14.wav','15.wav','16.wav']

		inst = setting.index   # instrument index
		paths = ['/piano/','/violin/','/flute/','/drum/']

		#init pydub stuff
		loop1 = AudioSegment.from_wav("/home/pi/Final/default1.wav")

		loop2 = AudioSegment.from_wav("/home/pi/Final/default2.wav")

		length = len(loop1)

		mixed = loop2[:length].overlay(loop1)

		#set up GPIO
		GPIO.setmode(GPIO.BCM)
		GPIO.setup(27, GPIO.IN, pull_up_down=GPIO.PUD_UP)
		GPIO.setup(19, GPIO.IN, pull_up_down=GPIO.PUD_UP)
		GPIO.setup(26, GPIO.IN, pull_up_down=GPIO.PUD_UP)

		def update_screen():
			screen.fill(CYAN)
			pygame.draw.polygon(screen, BLACK, ((60,50),(50,60),(70,60))) #up arrow
			pygame.draw.polygon(screen, BLACK, ((60,190),(50,180),(70,180))) #down arrow
			for text_pos, my_text in my_buttons.items():
				if text_pos == (200,60):
					font = my_font
					color = RED
				elif text_pos == (200,110):
					font = other_font
					color = RED
				else:
					font = other_font
					color = BLACK
				text_surface = font.render(my_text, True, color)
				rect = text_surface.get_rect(center=text_pos)
				screen.blit(text_surface, rect)
			pygame.display.flip()

		# blink on key pad
		# Turn on every LED, one at a time
		print("Turning on each LED, one at a time...")
		for i in range(16):
			trellis.led[i] = True
			time.sleep(0.1)
		time.sleep(1)

		# Turn off every LED
		print("Turning all LEDs off...")
		trellis.led.fill(False)
		time.sleep(2)

		print("Starting button sensory loop...")
		pressed_buttons = set()

		#pygame.mixer.pre_init(44100,16,2,4096)
		pygame.init()
		pygame.mixer.init()

		# looper is reay
		my_buttons[(200,60)] = 'Current mode: Keypad'
		update_screen()

		# set up GPIO callback functions
		def GPIO27_callback(channel):
			exit(0)
			print(27)

		def GPIO19_callback(channel):
			print("callback 19")
			global mode

			my_buttons[(200,140)] = "cha1: recording"
			update_screen()
			cmd1 = 'arecord -D hw:1,0 -d 6 -f S24_3LE /home/pi/Final/loop1.wav -c2 -r48000 &'
			os.system(cmd1)
			time.sleep(6)
			my_buttons[(200,140)] = "cha1: not recording"
			update_screen()

		def GPIO26_callback(channel):
			print("callback 26")
			global mode
			mode = 1
			my_buttons[(200,160)] = "cha2: recording"
			update_screen()
			cmd2 = 'arecord -D hw:1,0 -d 6 -f S24_3LE /home/pi/Final/loop2.wav -c2 -r48000 &'
			os.system(cmd2)
			time.sleep(6)
			mode = 2
			my_buttons[(200,160)] = "cha2: not recording"
			update_screen()

		GPIO.add_event_detect(27,GPIO.FALLING, callback=GPIO27_callback)
		GPIO.add_event_detect(19,GPIO.FALLING, callback=GPIO19_callback)
		GPIO.add_event_detect(26,GPIO.FALLING, callback=GPIO26_callback)

		while True:
			# Make sure to take a break during each trellis.read_buttons
			# cycle.
			time.sleep(0.1)

			#change GUI
			for event in pygame.event.get():
				if(event.type is MOUSEBUTTONDOWN):
					pos = pygame.mouse.get_pos()
					#update_screen()
				elif(event.type is MOUSEBUTTONUP):
					pos = pygame.mouse.get_pos()
					x,y = pos
					if y > 190 and y < 210 and x > 250 and x < 290: #if quit button
						mode = 1
						exit(0)
					elif y > 40 and y < 70 and x > 50 and x < 90: #if up arrow
						if(instrument_index == 3): #out of bounds
							instrument_index = 0
						else:
							instrument_index = instrument_index + 1
						my_buttons[(60,120)] = instrument_buttons[instrument_index]
						update_screen()

						print('up arrow')
						print(instrument_index)
						print(instrument_buttons[instrument_index])
					elif y > 170 and y < 200 and x > 50 and x < 90: #if down arrow
						if(instrument_index == 0): #out of bounds
							instrument_index = 3
						else:
							instrument_index = instrument_index - 1
						my_buttons[(60,120)] = instrument_buttons[instrument_index]
						update_screen()
						print('down arrow')
						print(instrument_index)
						print(instrument_buttons[instrument_index])
					elif y > 80 and y < 140 and x > 100 and x < 300: #if switch mode button
						if mode == 1:
							mode = 2 # looper mode
							my_buttons[(200,60)] = "Current mode: Looper"
						elif mode == 2:
							mode = 1 # keypad mode
							my_buttons[(200,60)] = "Current mode: Keypad"
						update_screen()

			# keypad mode
			if mode == 1:
				just_pressed, released = trellis.read_buttons()
				for b in just_pressed:
					name = '/home/pi/Final' + paths[instrument_index] + wavefiles[b]
					pygame.mixer.Channel(0).play(pygame.mixer.Sound(name))
					print("pressed:", b)
					trellis.led[b] = True
				pressed_buttons.update(just_pressed)
				for b in released:
					print("released:", b)
					trellis.led[b] = False
				pressed_buttons.difference_update(released)
				for b in pressed_buttons:
					print("still pressed:", b)
					trellis.led[b] = True

			# looper mode
			if mode == 2:
				# mixing channel 1 and 2 together
				if len(loop1) >= 5000:
					loop1 = loop1[:5000]
				if len(loop2) >= 5000:
					loop2 = loop2[:5000]
				try:
					loop1 = AudioSegment.from_wav("/home/pi/Final/loop1.wav")
					loop2 = AudioSegment.from_wav("/home/pi/Final/loop2.wav")
				except IndexError:
					print("try-except: index out of arange")
					loop1 = AudioSegment.from_wav("/home/pi/Final/default1.wav")
					loop2 = AudioSegment.from_wav("/home/pi/Final/default2.wav")
				length = len(loop1)
				mixed = loop2[:length].overlay(loop1)
				play(mixed)
				if (mode ==1): print("swiching back to keypad")